Crop It Like It's Hot
- thelastmccoylibrary

- Jan 19, 2022
- 5 min read
Updated: Jan 20, 2022
Preservation aims to present items as they are, not as they might be. This can be hard to grasp in a social media fueled society that embraces filters and image editing. However, images appear differently on a computer screen than they do in person. So it's important to go through some steps to ensure the image is clear, true to color, and framed properly for the viewer.
Here enters the photo editing tool GIMP, which stands for GNU Image Manipulation Program. The Last McCoy Library works to use non-proprietary programs (because companies that own programs can go bankrupt or decide to start charging fees thereby limiting access). So GIMP is an open access, non-proprietary program akin to Adobe Photoshop. All the same processes can be done, but in a program that is free and open for all the public to utilize. Below are the steps I take to clean up the scans of photographs for the OMEKA collection. An introduction and working knowledge of these steps were introduced in my digitization class led by Professor Krystyna Matusiak at the University of Denver in Spring 2021.
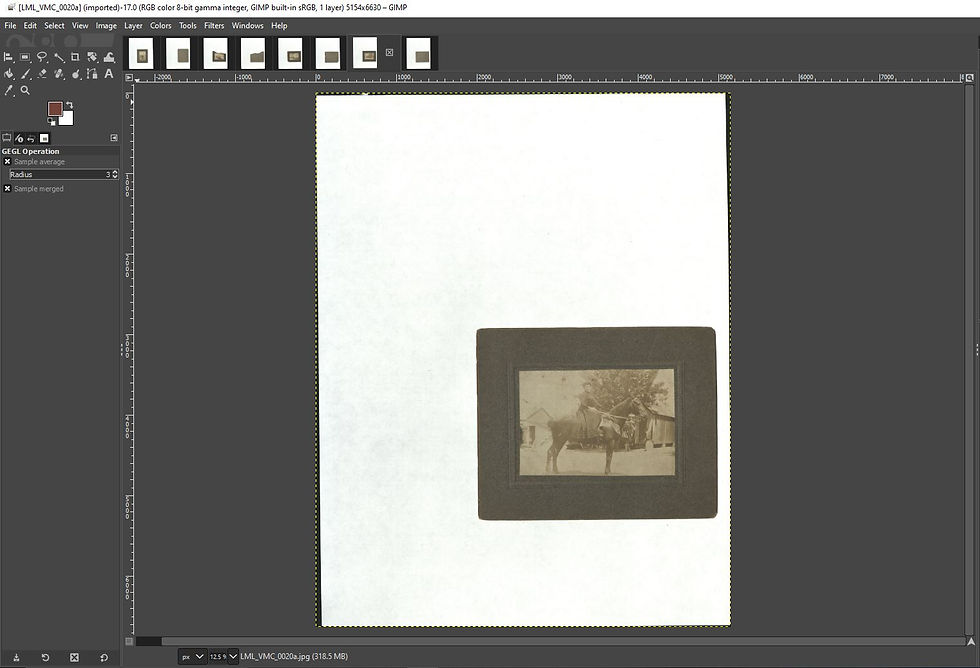
Image 1: The program GIMP is open with a large white sheet of paper and a single black and white photograph of a woman riding a horse. It has not been edited in any way since the original scan.
Step One: Rotate the images to 90 degrees. Even with guideline lights on a scanner, the images might not be true to 90 degrees and need to be gently rotated into the proper alignment. In GIMP, select Tools > Transform Tools > Rotate. Place the bullseye in the center of the photograph (not the larger piece of paper) and then rotate. I zoom in on the photograph and use the edges of the screen to find 90 degrees. Some photographs are bent or warped, so it's not always possible, but I get as close as I can.
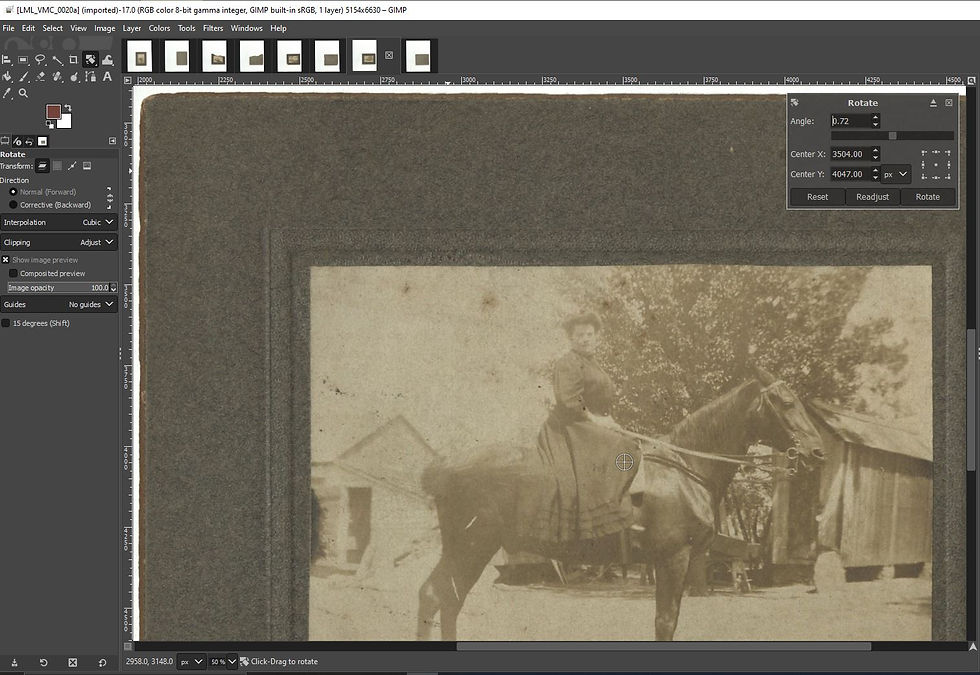
Image 2: The program GIMP is open with the rotate function tab visible in the top right hand corner. The same black and white photograph of a woman riding a horse is zoomed in on with two edges against the sides of the program to judge orientation.
Step Two: Crop the image. Scanners don't always pick up just the material. Sometimes they also scan giant swathes of the scanner's own base. In my case, I put a blank sheet of paper down so the scanner could recognize where the photograph was. Unfortunately, that means most of my photographs were scanned as the entire blank sheet of paper. So I have to crop out a significant amount. Now that the photograph has been rotated to a proper 90 degree angle, I can crop as close as possible to the outer edge of the photograph. In GIMP, select Tools > Transform Tools > Crop.
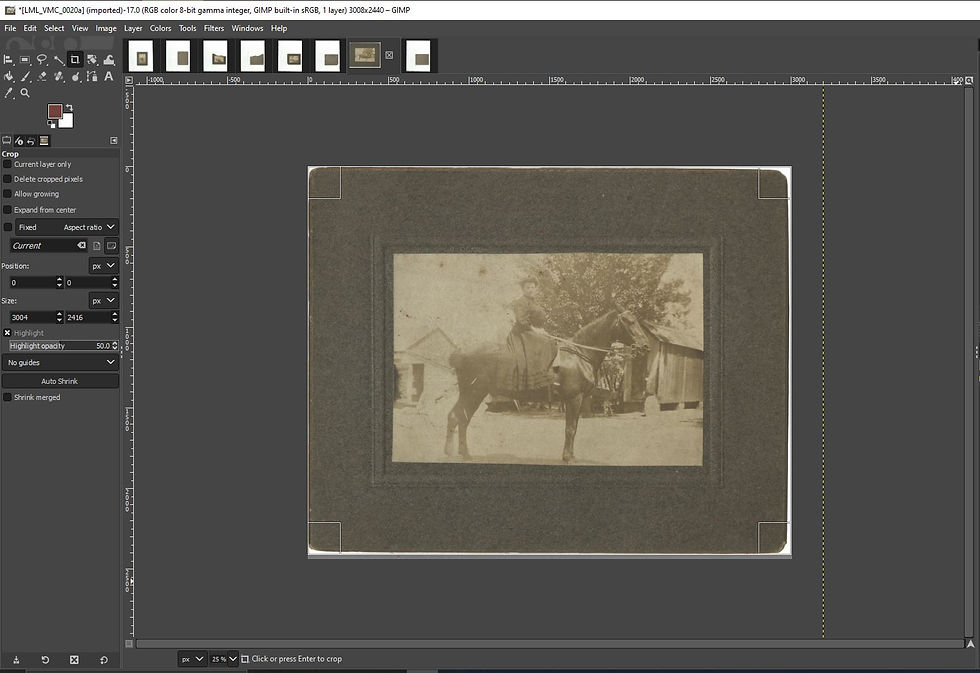
Image 3: The program GIMP is open with the crop function selected, evident by the small outlined boxes in all four corners of the photograph. The white piece of paper has been cropped off the black and white photograph of a woman riding a horse.
Here I save the image as the Archival Master File so the original scan can be referenced and stored at the highest possible resolution without any edits as discussed in my previous post An Image a Day Keeps Decay Away. In GIMP, use the Export As function to save the image. Typically there are no edits to Archival Masters, but my scans have so much white space due to the scanner functions that it makes the most sense to get rid of the unneeded space and thereby prevent my hard drive from storing extra, unnecessary Gigabytes.
Step Three: Adjust the histogram. This sounds scary and it looks scary when you open the tool. But a histogram is just a graph that measures the brightness of the photograph with pure black on the left and pure white on the right. Older photographs and documents, especially those that are faded, can have a skewed histogram. So it's important to move the sliders on either edge of graph to the edges of the histogram thus restoring a proper balance of brightness. In GIMP, select Colors > Levels.
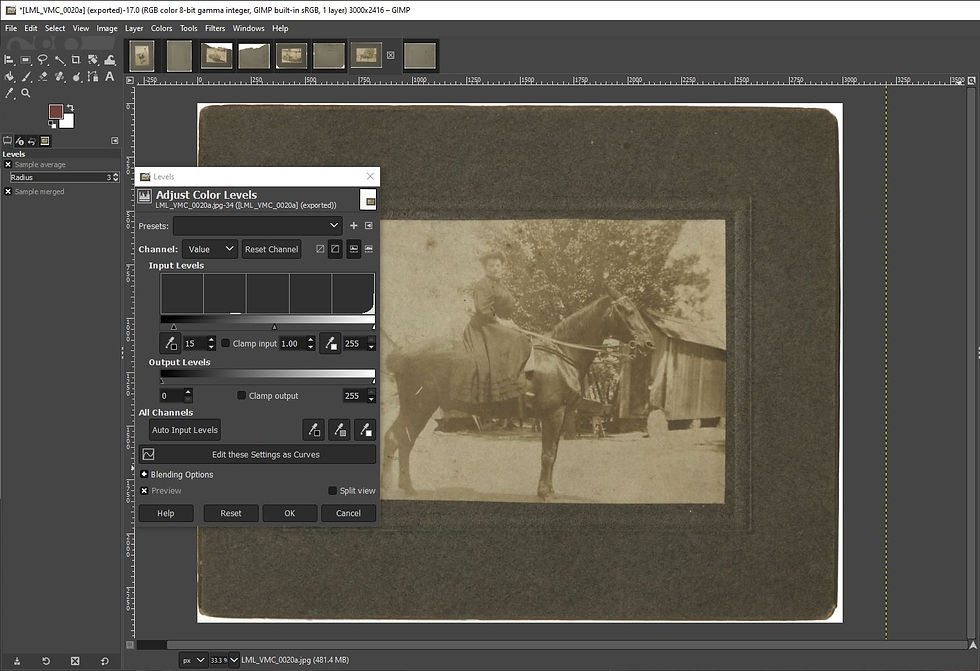
Image 4: The GIMP program is open with the histogram showing to the left. The graph is flat until a sharp spike on the right hand side, which represents true white. The histogram lacks the typical curve so the image is simply adjust a little bit to increase the darkness in the photograph and thus the contrast. It's still the same black and white photograph of a woman riding a horse, but slightly darker and clearer in detail.
Step Four: Sharpen the image. Sharpening is done sparingly in preservation work. The image should still look mostly like the physical photograph, not strikingly defined like modern photographs. So the settings that pop up in the sharpen tool are lightly adjusted and done uniformly across all materials. In GIMP, select Filters > Enhance > Sharpen (Unsharp Mask). As taught by Professor Matusiak, I set the radius to 1.000, amount to 0.800, and the threshold between 0.000-0.500. I've settled mostly around 0.300 for the threshold.
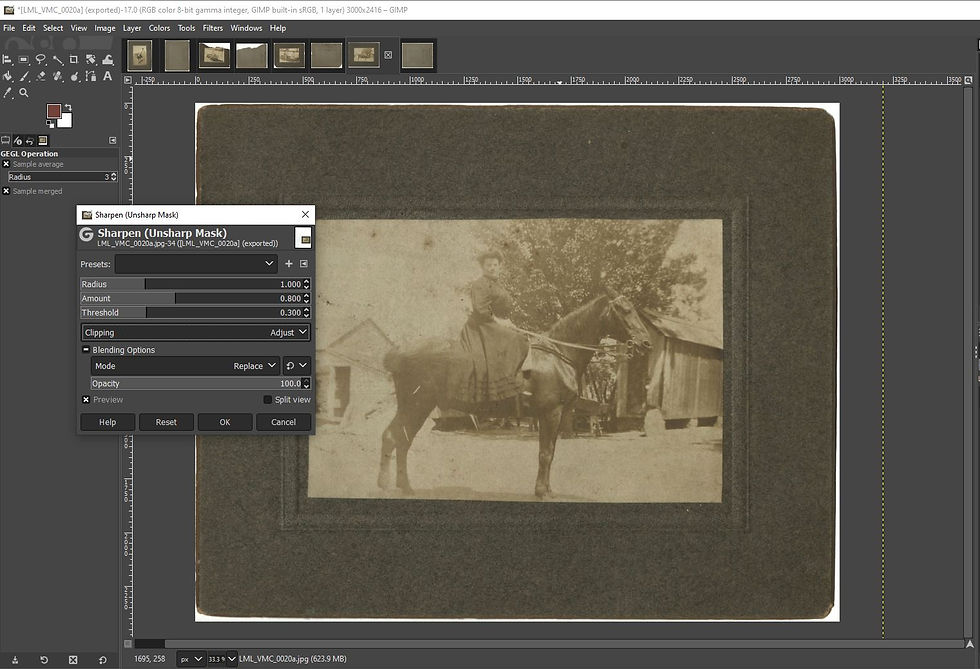
Image 5: The program GIMP shows the sharpen tool with options for Radius, Amount, and Threshold. The same black and white photograph of a woman riding a horse sits in the center, slightly sharper in focus than in previous images.
Here I save the image as a Service Master.
Step Five: Scale the Image. In order to create the version of the photograph destined for the internet, the size needs to be reduced. The OMEKA collection has a maximum size for files and both Archival Masters and Service Master images are far too large due to the insane resolution needed for preservation. So the image needs to be scaled. In GIMP, select Image > Scale Image. Then change both the pixel dimensions and the resolution. For pixel dimension, I choose 1024 pixels on the long side. This is the standard number of pixels on a modern computer screen and allows for pretty in depth viewing. For resolution, I pick 72 ppi. If anyone needs a higher resolution or bigger image, they can contact me. But web viewing doesn't require it.
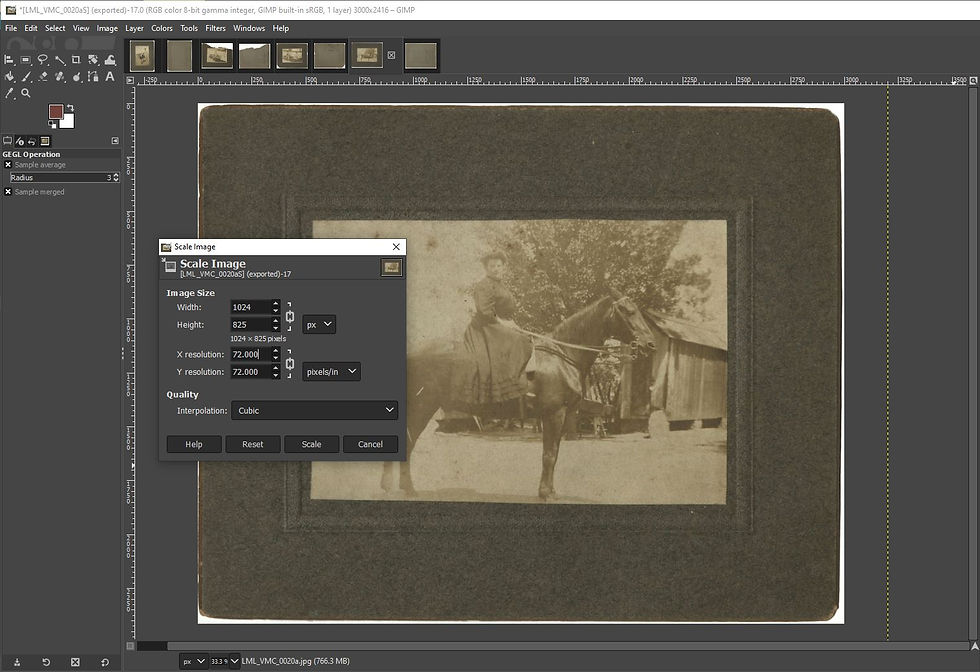
Image 6: The program GIMP shows the Scale Image function with the long side of the image set to 1024 pixels and the resolution set to 72ppi. It still features the black and white photograph of the woman riding the horse as the other images.
Here the image is saved as a Web Access File.
While the process seems arduous, it becomes second nature. I process multiple photographs at the same time. When doing so, I perform each step across all photographs before moving onto the next. This prevents me from getting confused about which photograph has been processed and when to save the various files.

Comments